
The base of GitLab CI is a file called .gitlab-ci.yml which is created in the root level of a repository. It contains what steps the CI workflow should go through, which scripts to run, what dependencies there are, and similar configuration details written in YAML syntax.
The handy thing about this approach is that .gitlab-ci.yml is also subject to version control, simply because it’s part of the Git repository itself. This file is automatically detected and used by GitLab and the GitLab Runner executes what is contained in there.
The Gitlab CI server, also called coordinator, doesn’t execute pipelines itself, but delegates this to so-called »runners«. A runner is a process that can run on any machine and polls the coordinator to pick up and process pending jobs. The execution is displayed on the »Pipelines« page. The runner is kind of a bot with a terminal that also shows what it’s doing and what’s happening during execution. The hosted version of GitLab at GitLab.com provides runners out of the box while self-hosted GitLab instances require setting up own runners.
Once runners are set up and a .gitlab-ci.yml file is present in the repository, the runner checks/executes the CI pipeline on any branch of the repository on every push or commit.
Minimal GitLab CI/CD pipeline
Configuring a basic CI/CD pipeline in the .gitlab-ci.yml file is done in YAML syntax.
image: node:12

before_script:
  - node -v
  - npm -v
  - npm ci

test:
  script:
    - npm test

link:
  script:
    - npm run lint

build:
  script:
    - npm run build
Usually, GitLab uses Docker-based runners for CI jobs which means you can/need to specify a base image using the image property. The base image can be defined globally for the whole pipeline or individually for each job. The example above uses node:12 as base image.
Next, we define which prerequisites have to be fulfilled or exist for our pipeline to run without errors. For this, we can make use of the before_script phase where we make sure that the dependencies which we need are present. The commands entered in the before_script phase are processed first by the runner before executing any job.
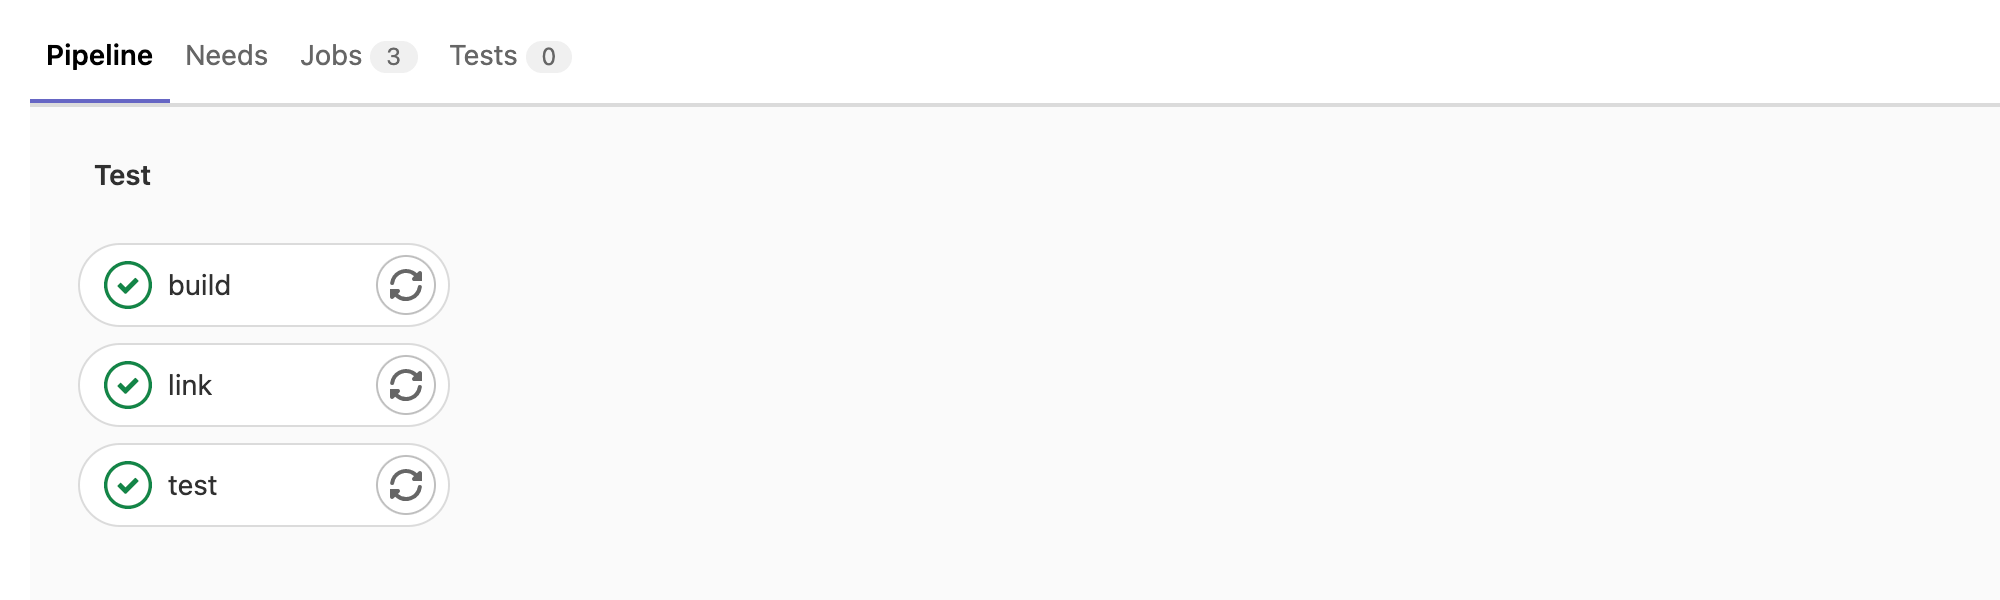
Finally, we describe the 3 jobs to run. For each job, the necessary steps/scripts (i.e. commands) can be defined. All 3 jobs will run in parallel and each execute the commands in before_script upfront.
Job states
Jobs can have different states which is reflected in the respective icons in GitLab CI’s interface.


These status icons have the following meaning.
- Gray dot = inactive/pending job
- Blue pie = active/running job
- Green checkmark = successful/completed job
- Orange exclamation mark = warning
- Red cross = failed job
- Dark gray gear = manual job
- Gray guillemet = skipped job
- Dark gray line = canceled job
- Dark gray clock = scheduled job
Advanced GitLab CI/CD pipeline
A big downside of the aforementioned minimal pipeline is that (computationally intensive) commands such as npm ci are executed over and over again for each job while it would make sense to do this upfront once. In addition, we may want to run the build job only if the test and lint jobs finished successfully.
Build artifacts
If your pipelines builds/exports something that is supposed to be used somewhere else (e.g. a report or a static build of a website or web app), GitLab can store these build artifacts and makes sure that these artifacts can be used by other jobs in the same pipeline or downloaded via the GitLab user interface.
build:
  script:
    - npm run build
  artifacts:
    paths:
      - build
    expire_in: 1 week
Stages / Phases
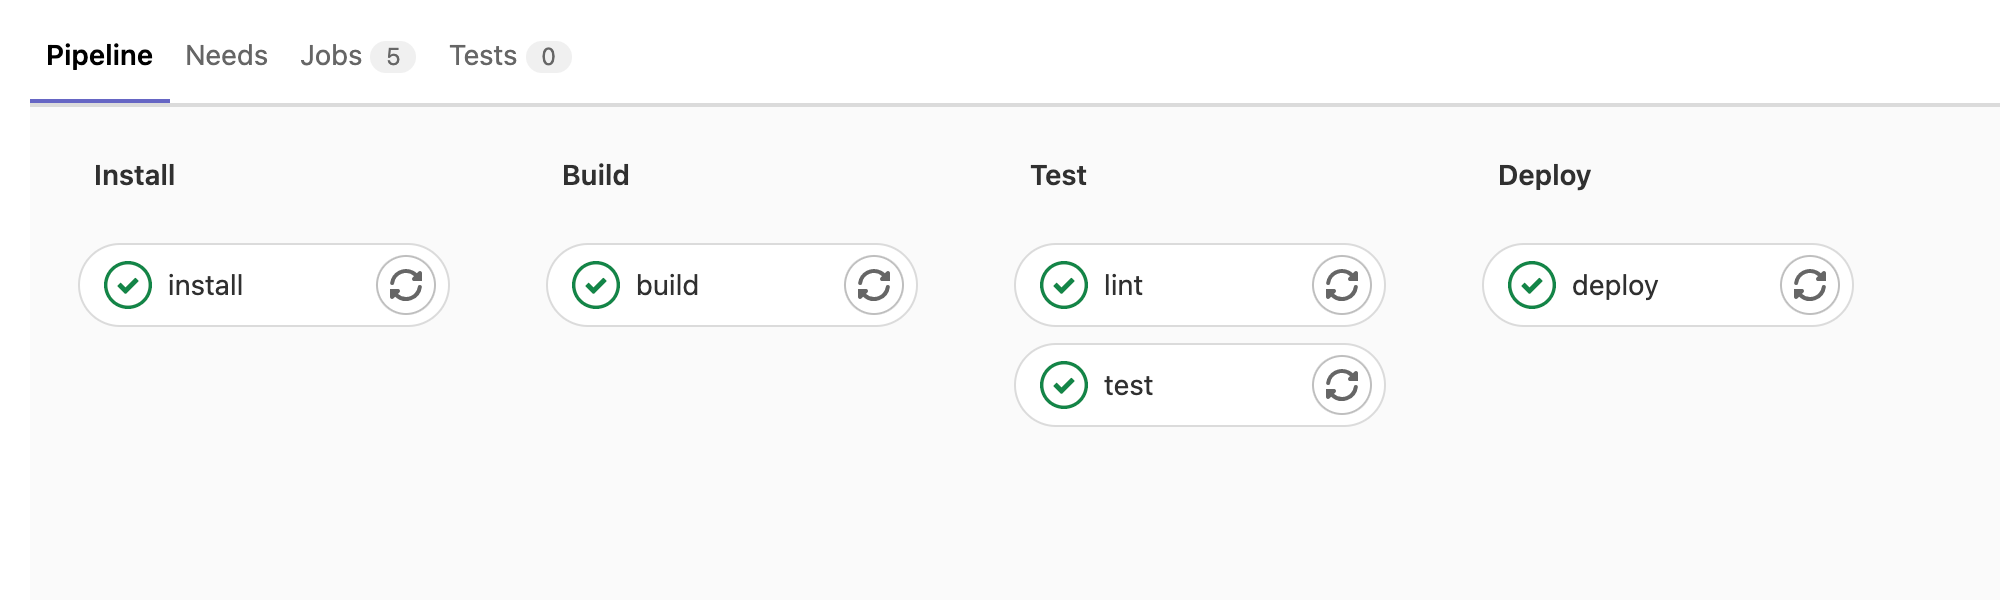
To implement order and dependencies between jobs in a pipeline, build stages can be used. Stages and their respective order need to be defined upfront, allowing to assign jobs to specific stages.
image: node:12

stages:
  - install
  - build
  - test
  - deploy

install:
  stage: install
  script:
    - npm ci
  artifacts:
    untracked: true
    expire_in: 1 hour

build:
  stage: build
  dependencies:
    - install
  script:
    - npm run build
  artifacts:
    untracked: true
    expire_in: 1 hour

test:
  stage: test
  dependencies:
    - build
  script:
    - npm test

lint:
  stage: test
  dependencies:
    - build
  script:
    - npm run lint

lint:
  stage: deploy
  dependencies:
    - build
  script:
    - echo "Run deployment"
Within a stage, all jobs will still run in parallel or depending on manual dependency definitions.
As jobs are independent of each other, you may want/need to pass intermediate build results between stages (e.g. pass the built static website of the build stage/job to the deploy stage/job for deployment). For this, artifacts can be used.
Runner configuration
In GitLab, a distinction must be made between »shared« and »specific« runners. A specific runner serves only certain projects, while shared runners process all jobs for which no specific runner exists and which are enabled for the use of shared runners (i.e. »Settings« → »CI / CD« → »Runners« in the project settings).
Since not all jobs always work in all environments, tags can be used to control which jobs can run on which runners. If a job has been assigned tags, it will only be executed on a runner with the matching tags. If multiple runners are eligible to run a job, one of them is selected at random.
install:
  stage: install
  script:
    - npm ci
  artifacts:
    untracked: true
    expire_in: 1 hour
  tags:
    - sometag